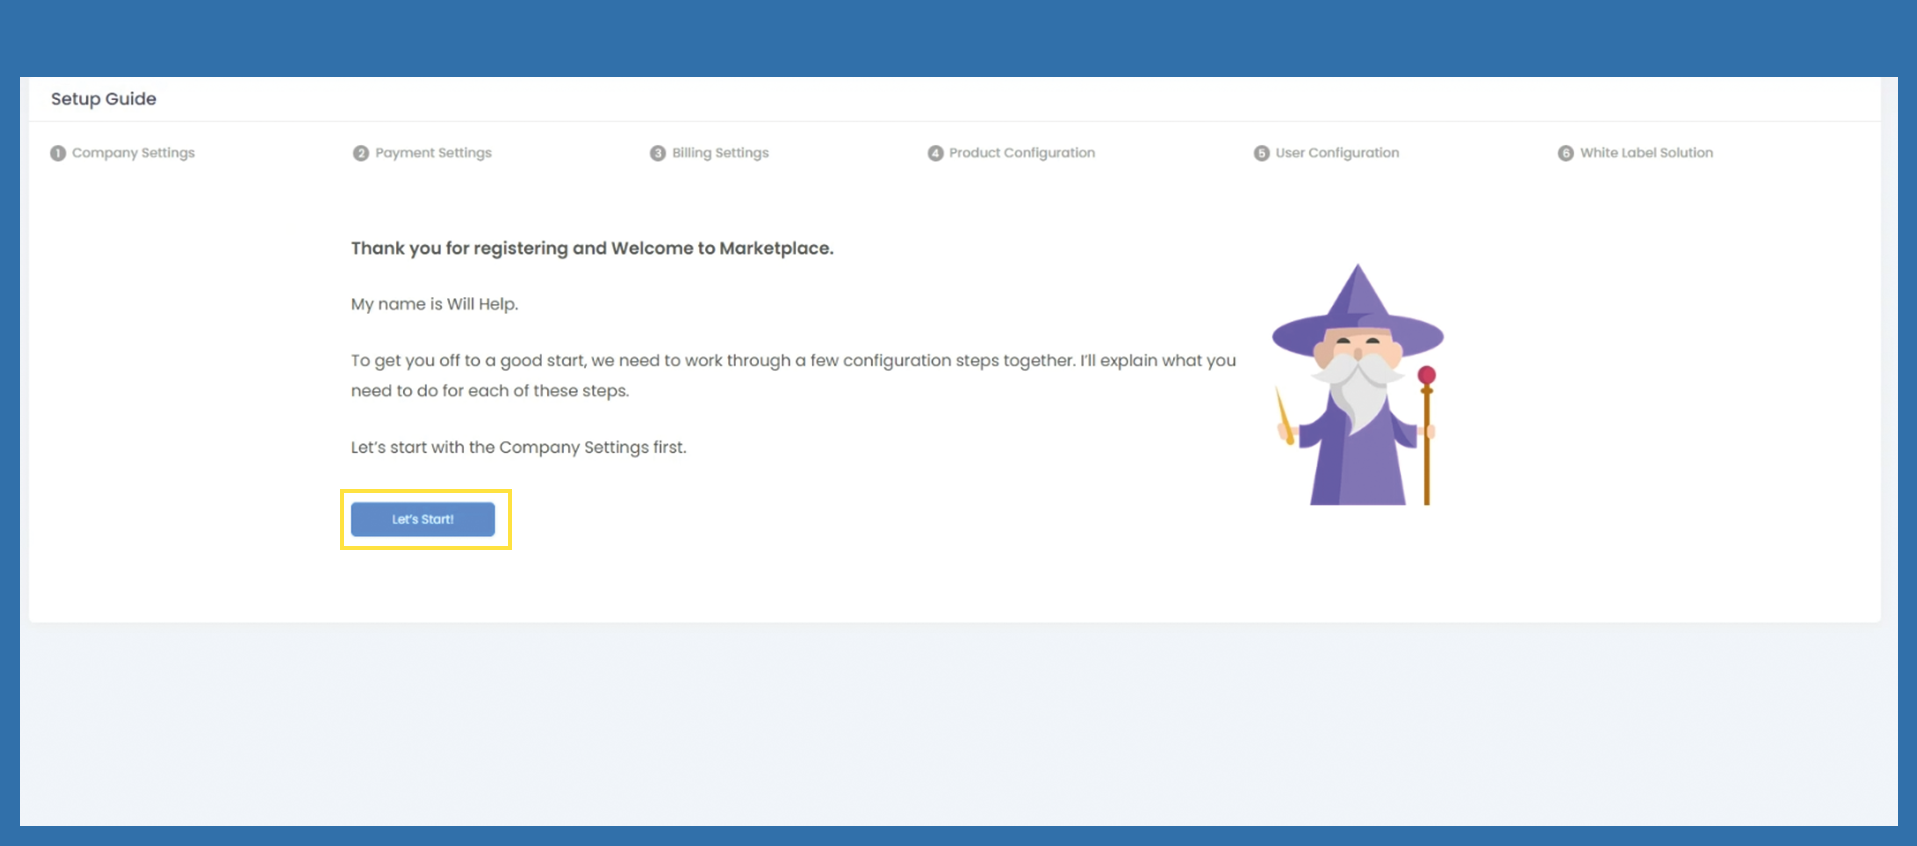
First things first
Will Help will guide you throught the most important settings to get started with the marketplace.
Please click on Let´s Start!
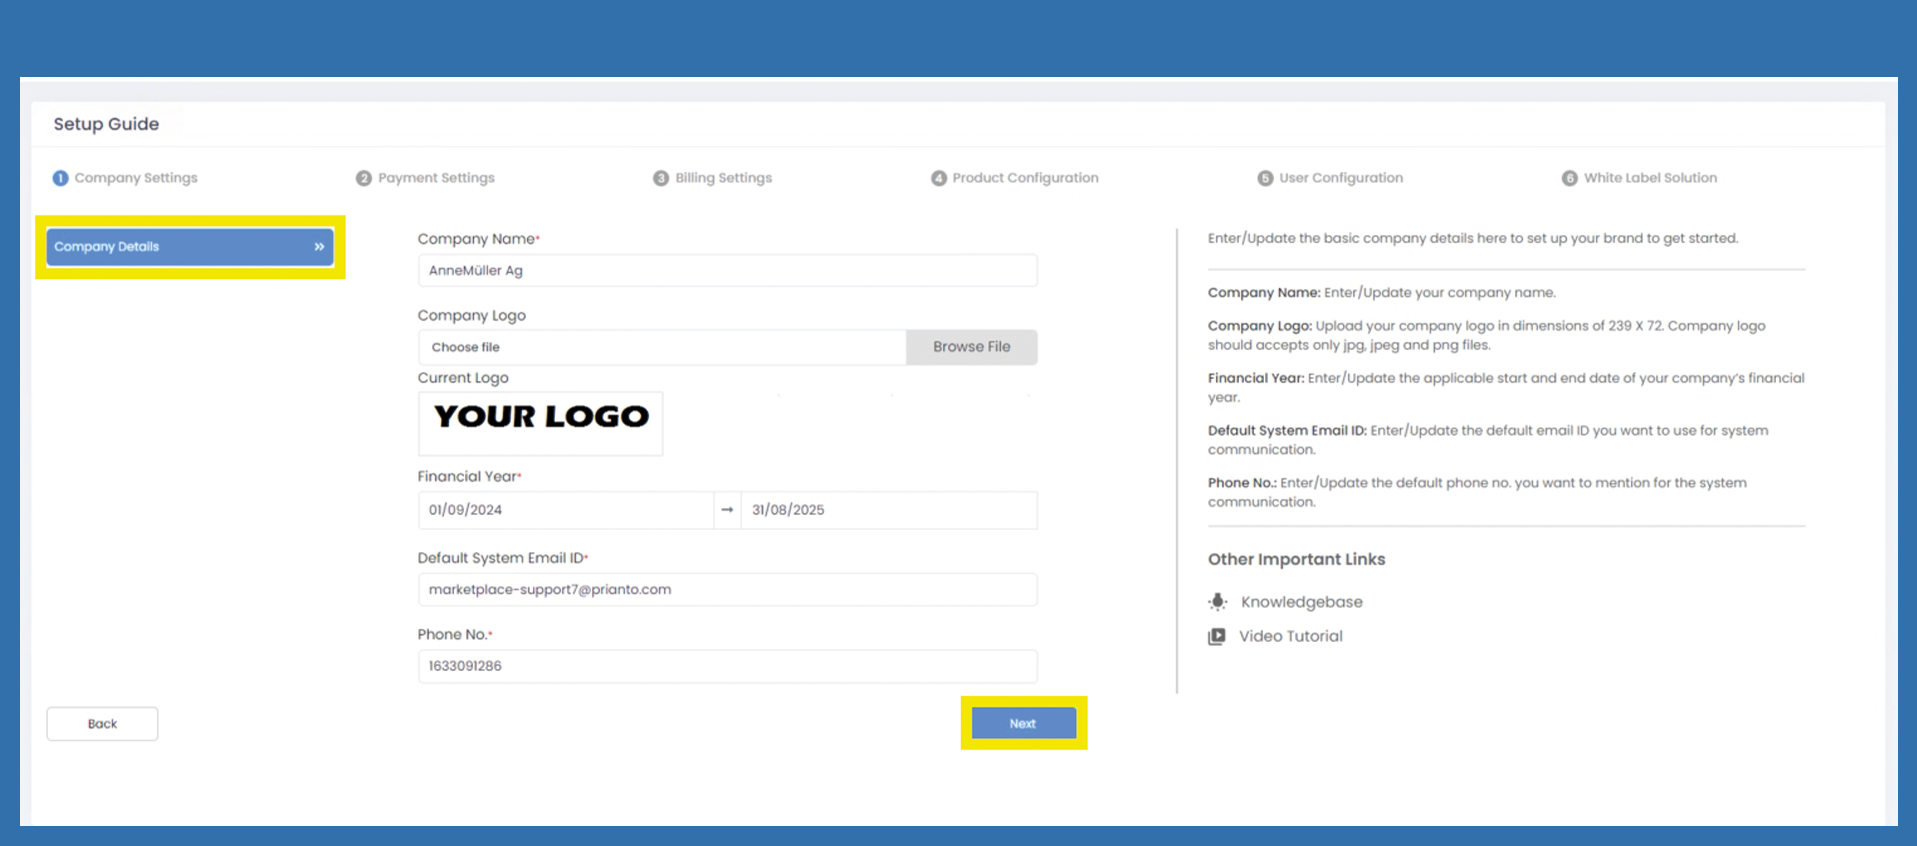
Company Settings
Company name, default system e-mail ID and telephone number are filled in automatically. The data is retrieved from the registration page. Please check the data for accuracy and correct it if necessary.
Select the logo and note the appropriate size of the logo. This is described on the right-hand side. A popup will open, the blue frame is intended as a control function for the correct size. Within the popup you have to click on Save Image.
Adjust the financial year to your financial year.
If all data is filled in correctly, click on Next to go to the next page.
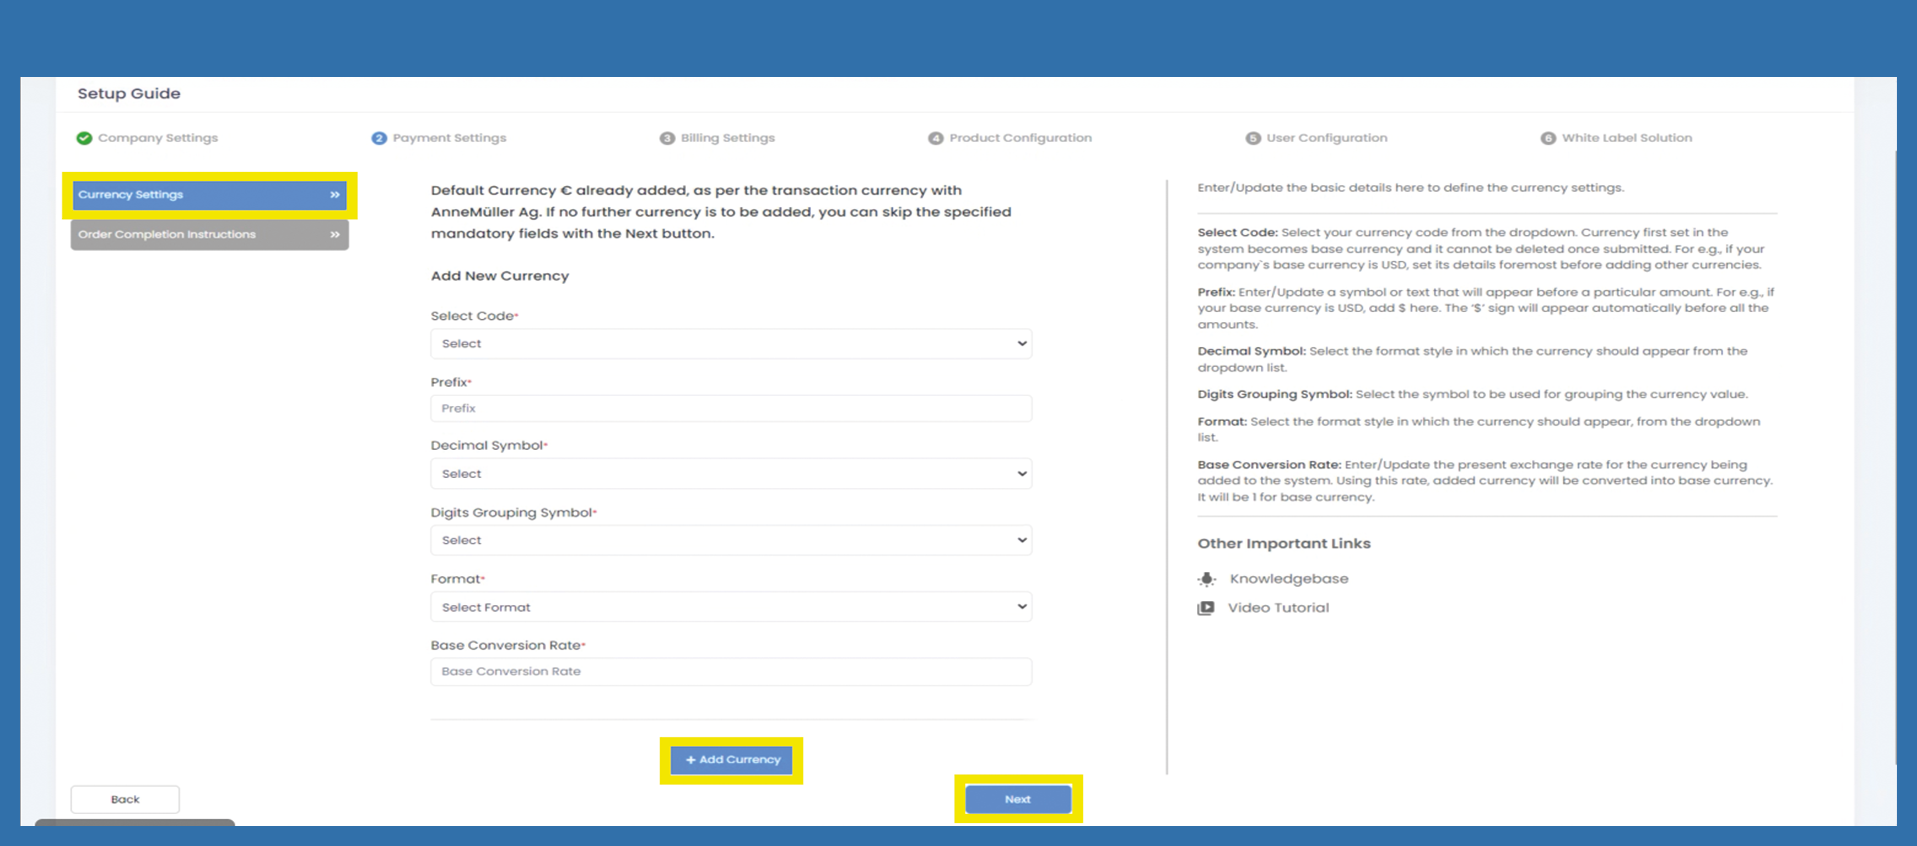
Payment Settings > Currency Settings
The default currency is EUR. If no further currency is to be added, you can skip to the next point with Next.
If you want to add another currency, please fill in the following fields. The description can be found on the right-hand side.
Then click on +Add Currency.
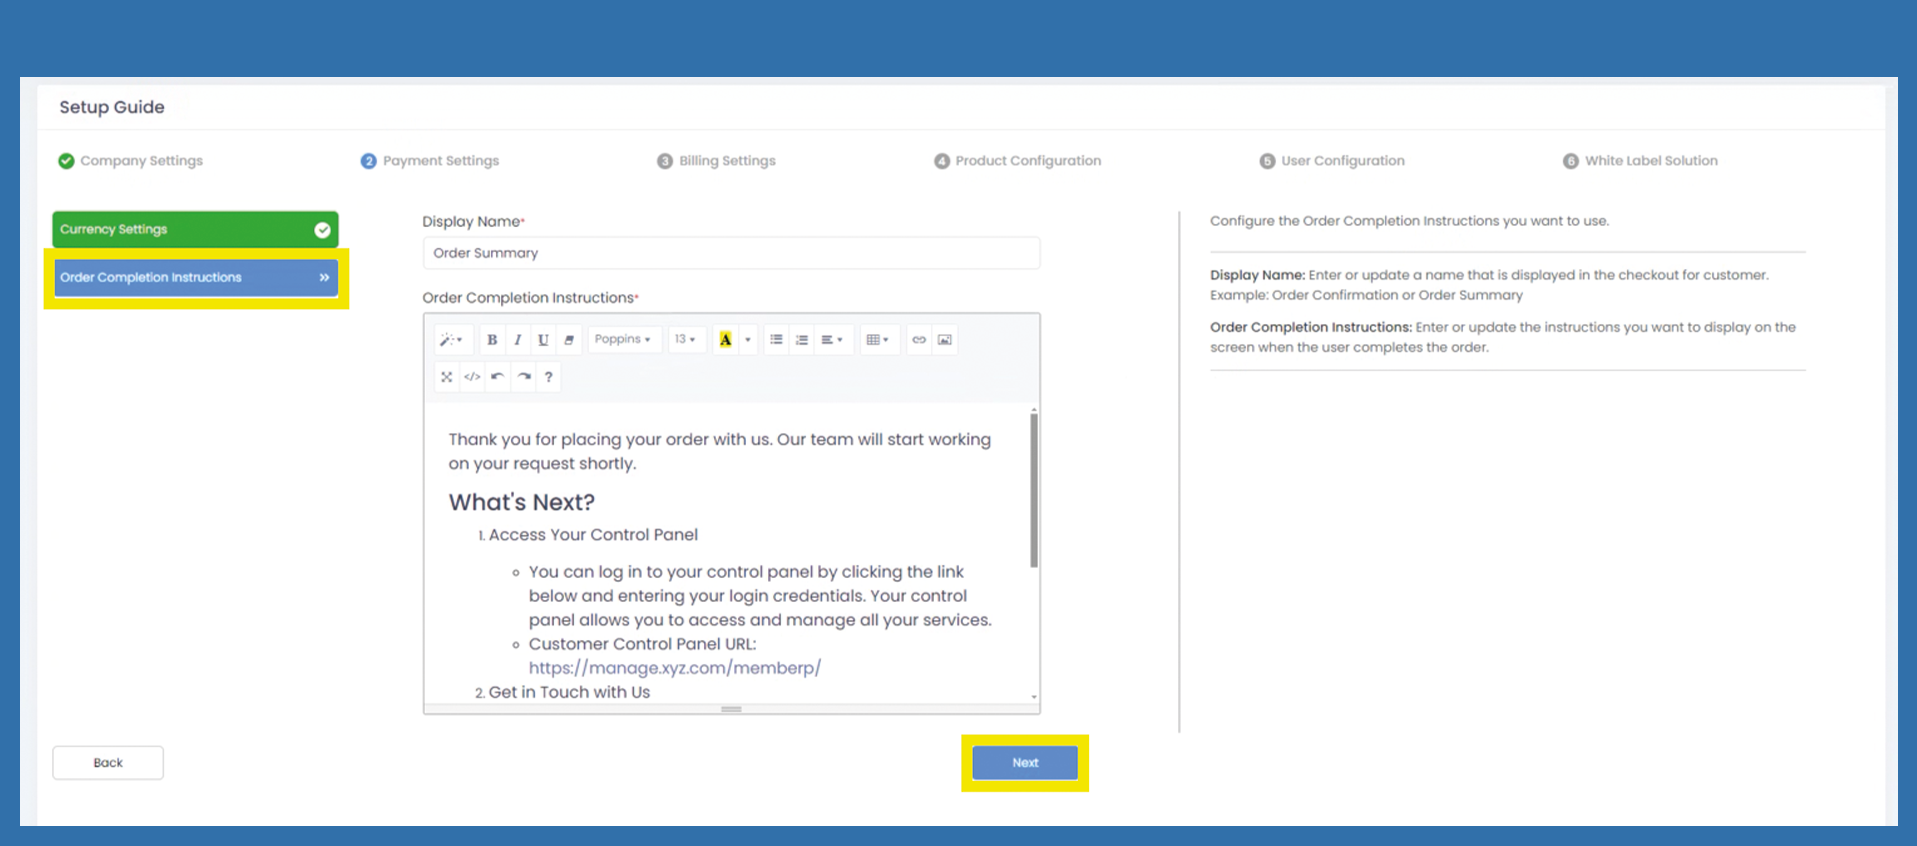
Payment Settings > Order Completion Instructions
Enter here which message you would like to send to your end customer as soon as they have sent an order.
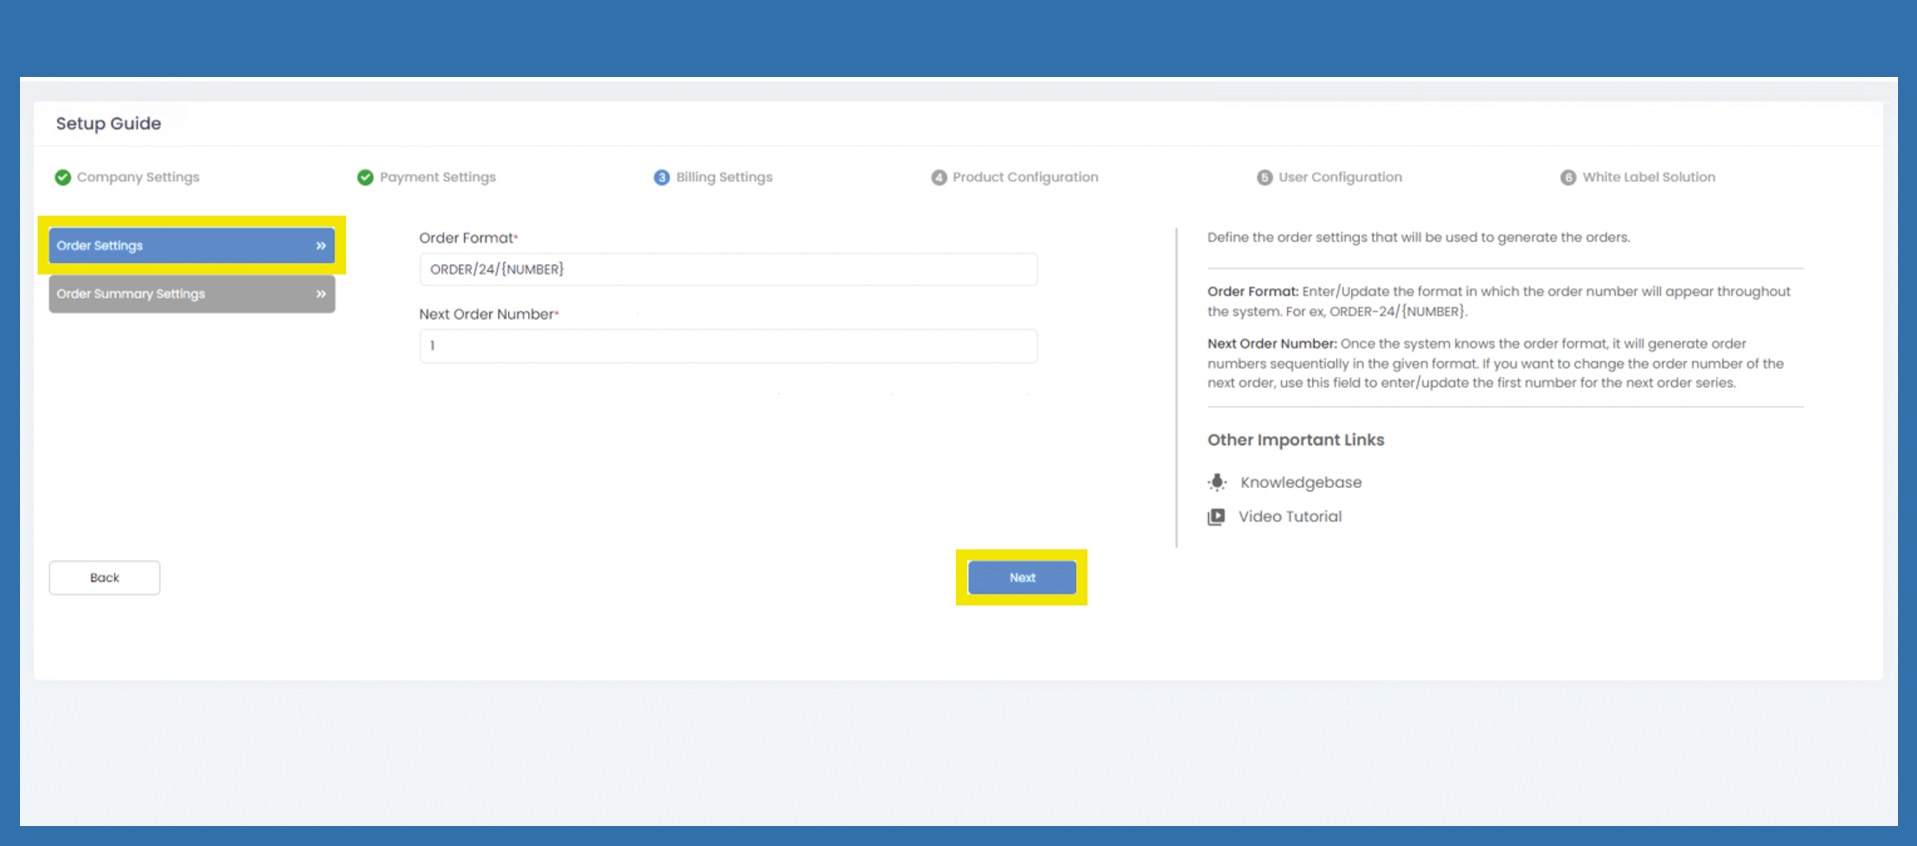
Billing Settings - Order Settings
In general, you can assign your document format however you like. It is also not necessary to enter a year.
However, the variable {NUMBER} is important. This variable automatically draws the next number.
Enter your desired order number here. The Next Order Number will be appended to the previously assigned order number.
Click on Next.
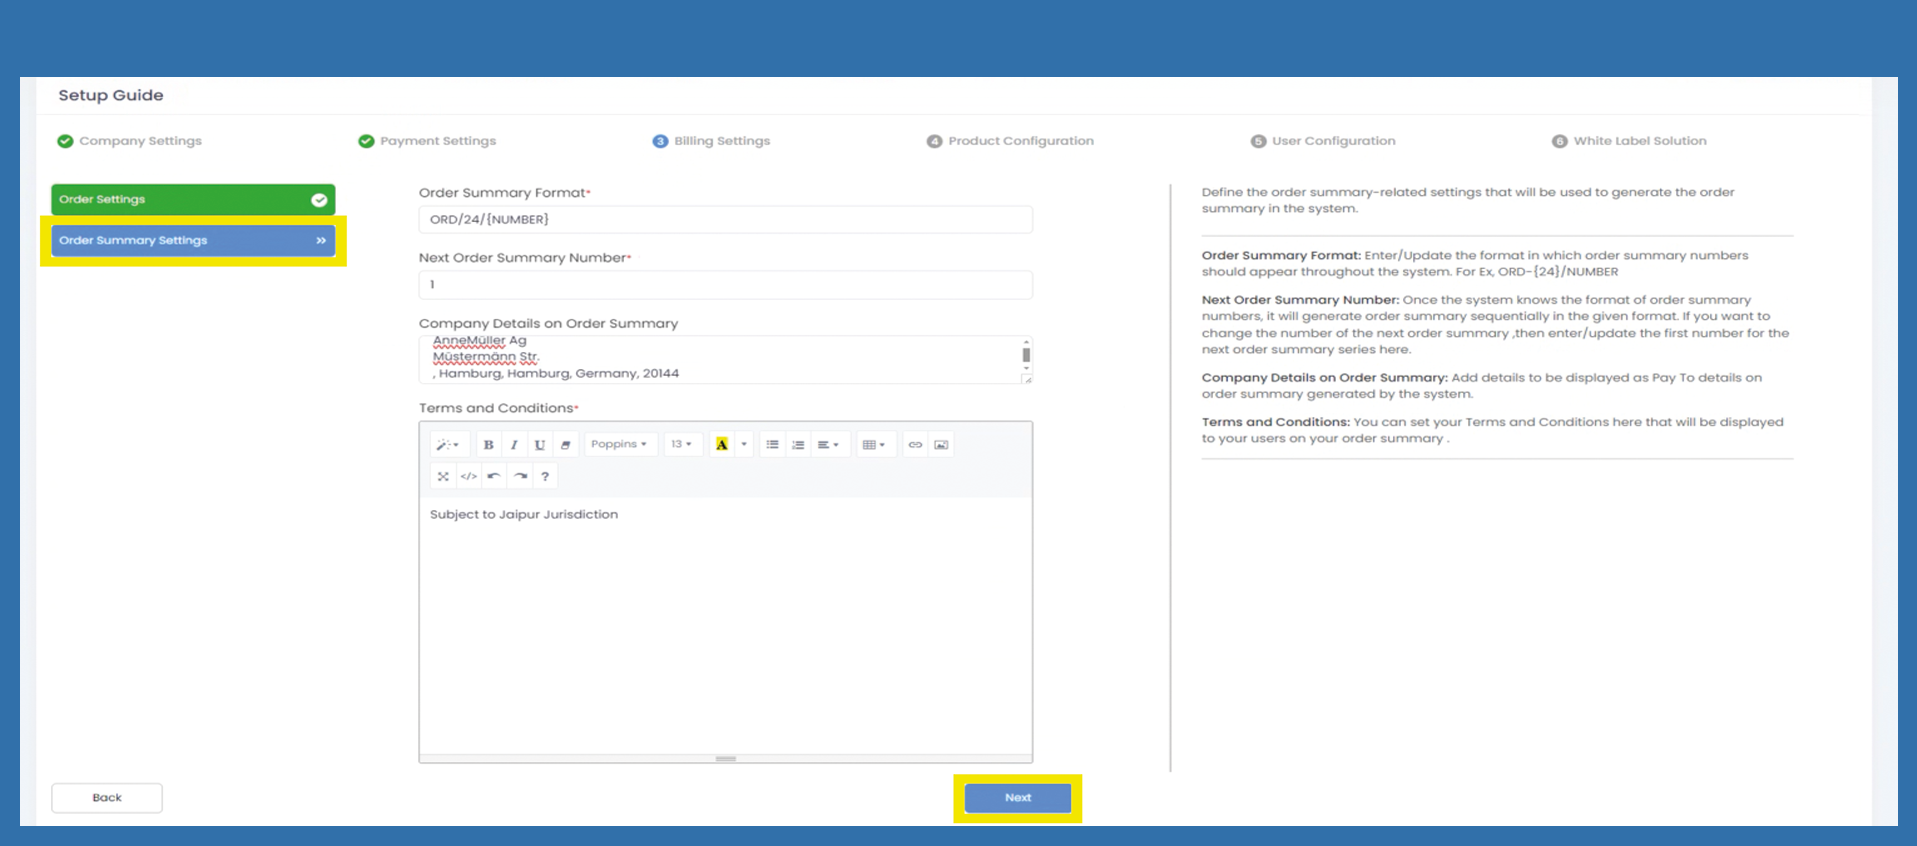
Billing Settings > Order Summary Settings
Enter your desired order summary number here. The Next Order Summary Number is appended to the previously assigned order summary number. Enter your company name and address here in the Company Details on Order Summary. You can write terms and conditions on your order confirmation here if you need them at this point.
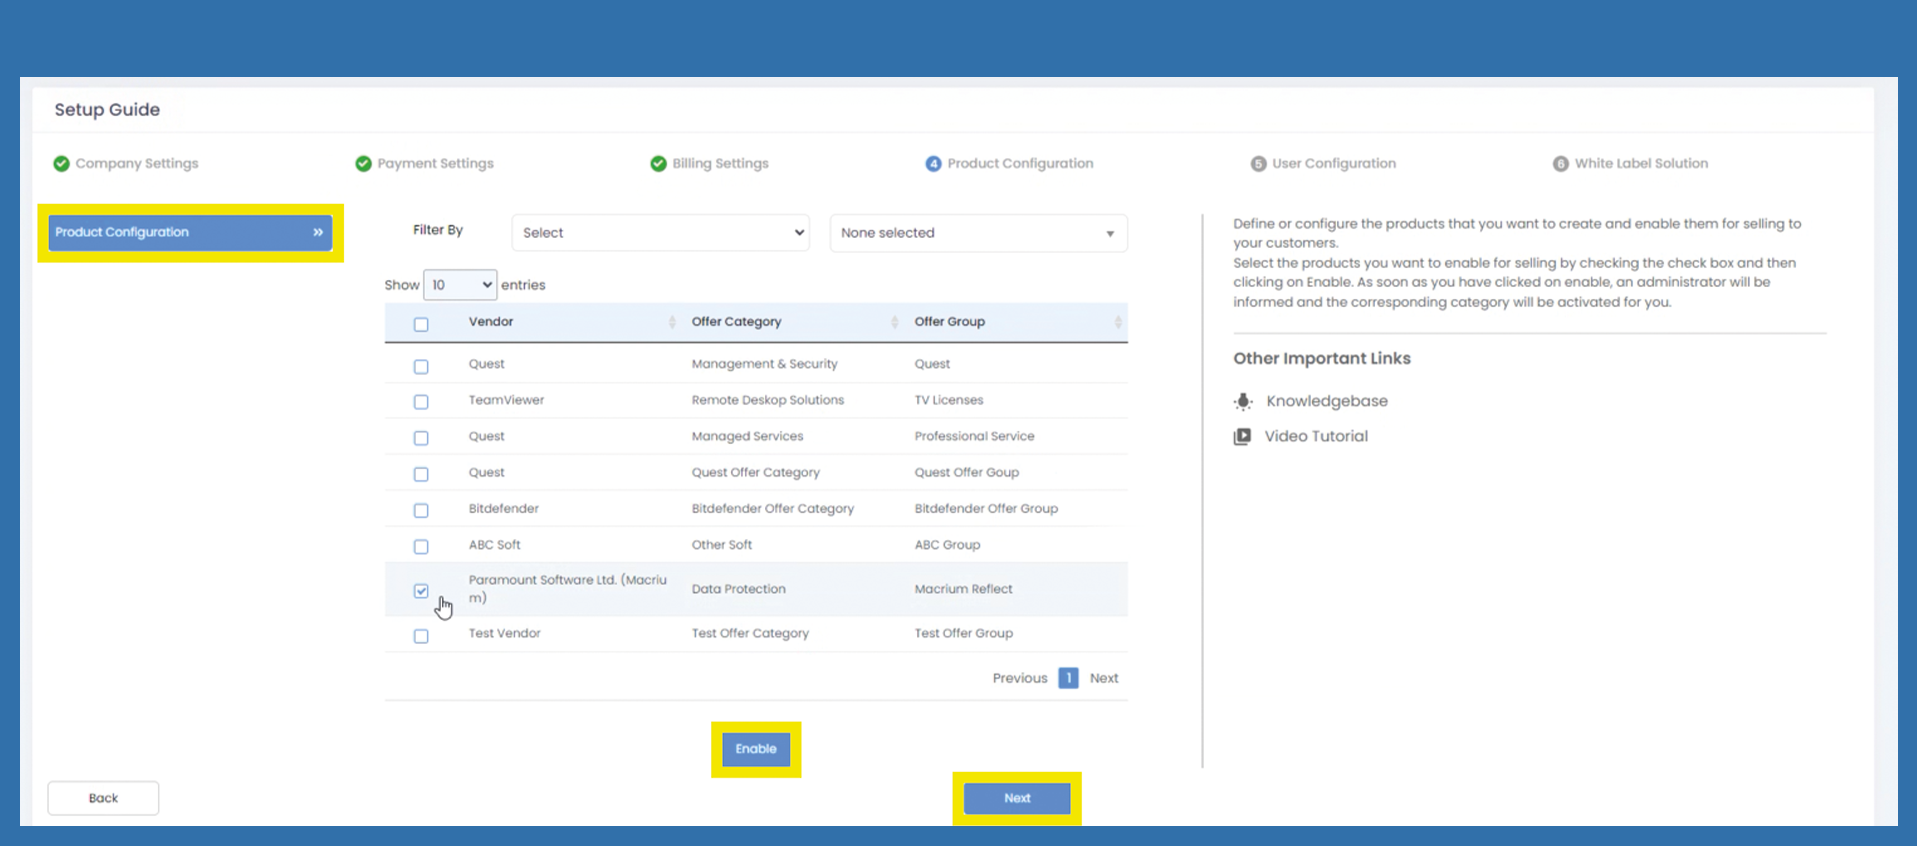
Product Configuration
Use the Filter Section to choose which products you want to sell. Please note, that you are not allowed to sell every offer Category.
Select the Filer for Offer Category, Vendor, or Offer Group. Use than the filter to the right to detail your filter and search for the right products.
After the corresponding products have been selected, confirm your selection with Enable.
Then click on Next.
By clicking this button, a corresponding request is sent to a Prianto employee. They will check whether you are authorized to sell or not. You will receive a rejection or confirmation.
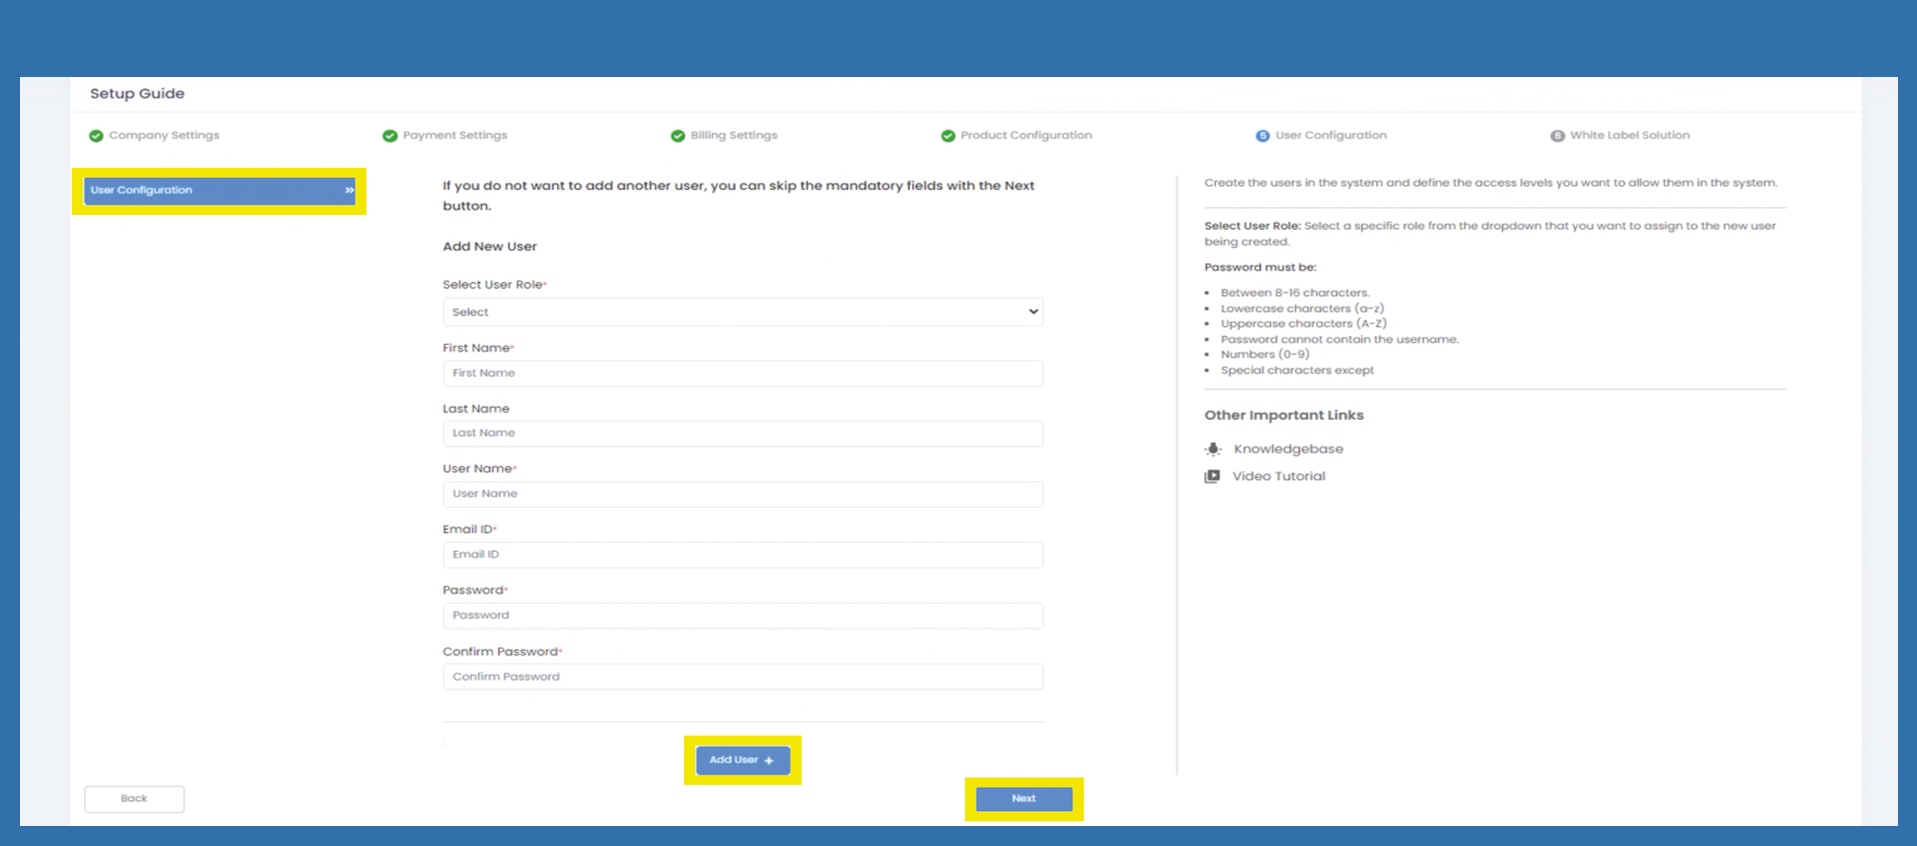
User Configuration
If you want to add more users from the start, you can create them here and assign the corresponding roles.
Select User Role is controlled from the Admin Panel. Further roles can be created later.
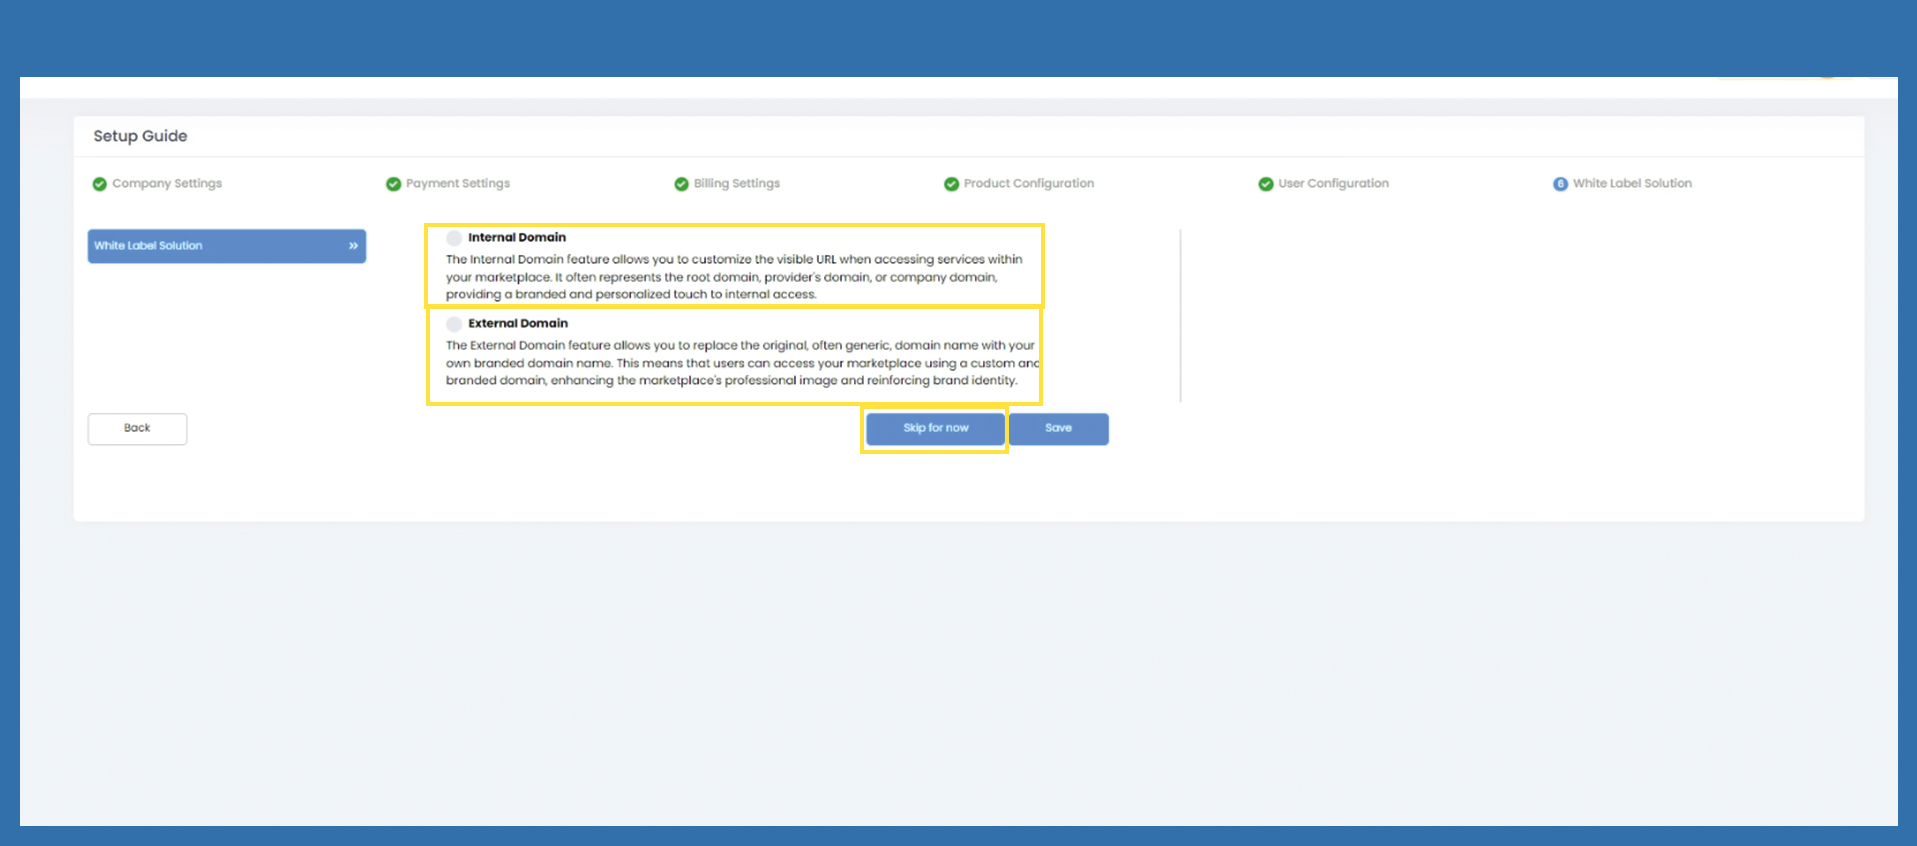
White Label Solution
After registration you have received a URL for your Admin Panel, which was automatically assigned by the system.
At this point, you need to decide how you want to work with the Marketplace in the future. You have the following options:
1) If you want to continue working with the automatically created URL, you do not need to make further changes here. Use the Skip for now button to come to the dashboard of your admin panel.
2) If you want to continue working with your own URL, you can mark Internal Solution. For more instructions click on Internal Domain.
3) Design your hole Marketplace according to your own wishes. Please use a DNS that is in your possession or buy a corresponding domain. For more instructions click on External Domain.