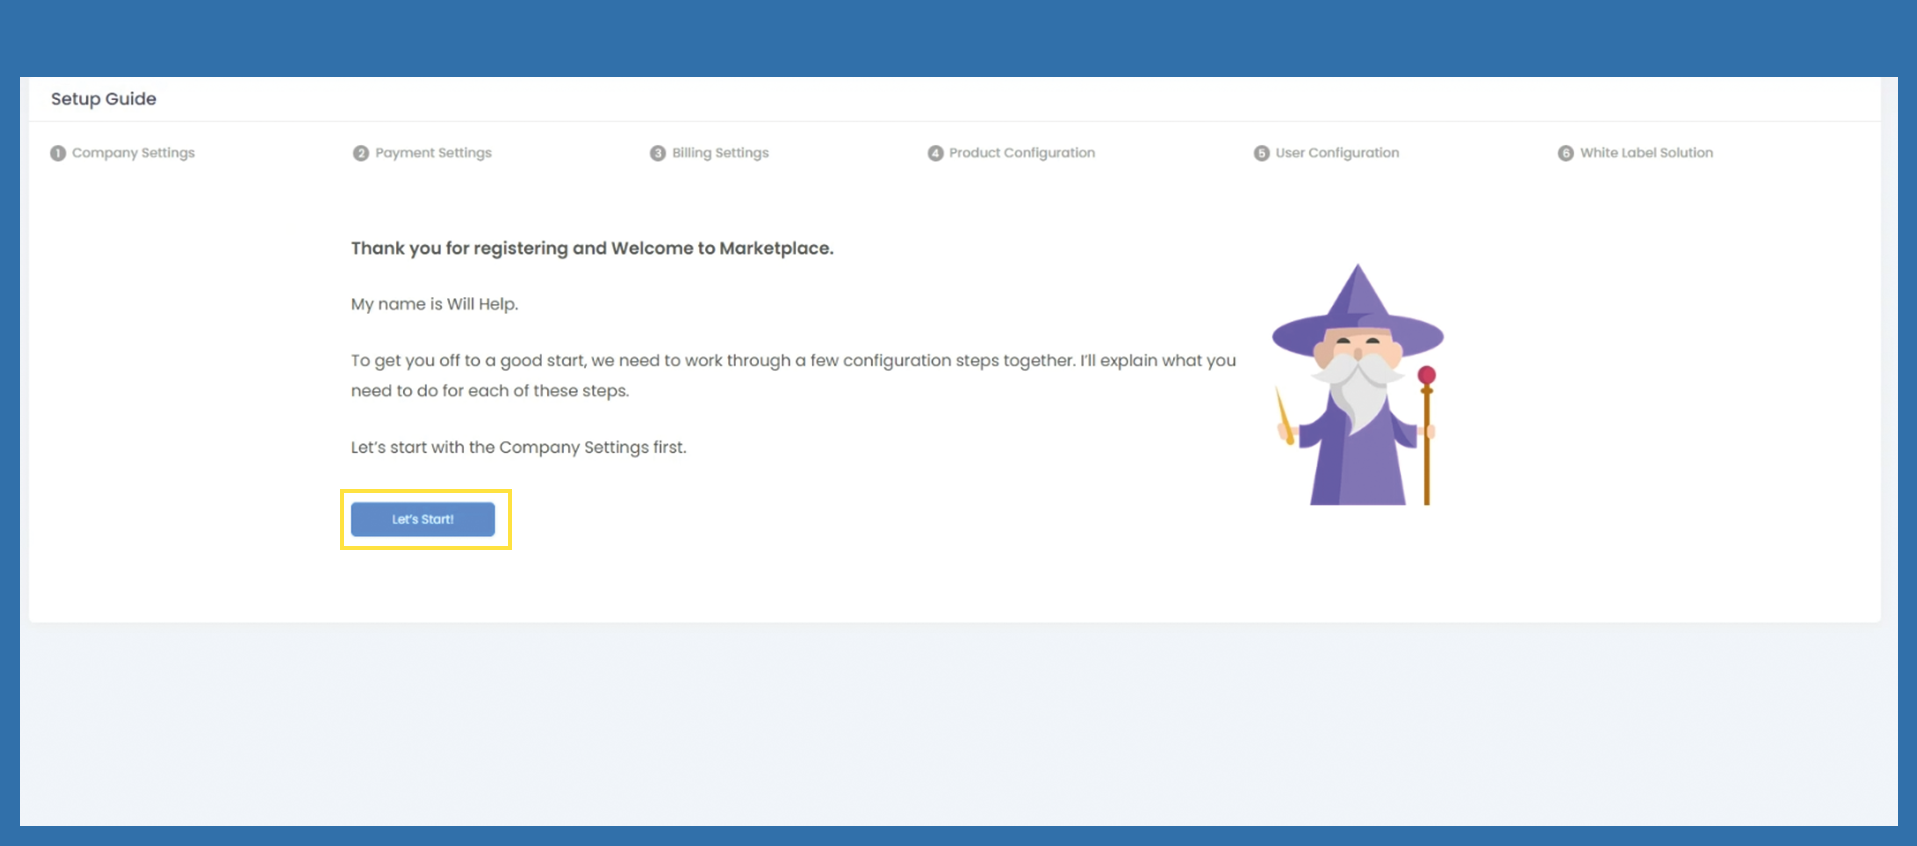
First things first
1)Will ClickHelp will guide you throught the most important settings to get started with the marketplace.
Please click on Let´s StartStart!
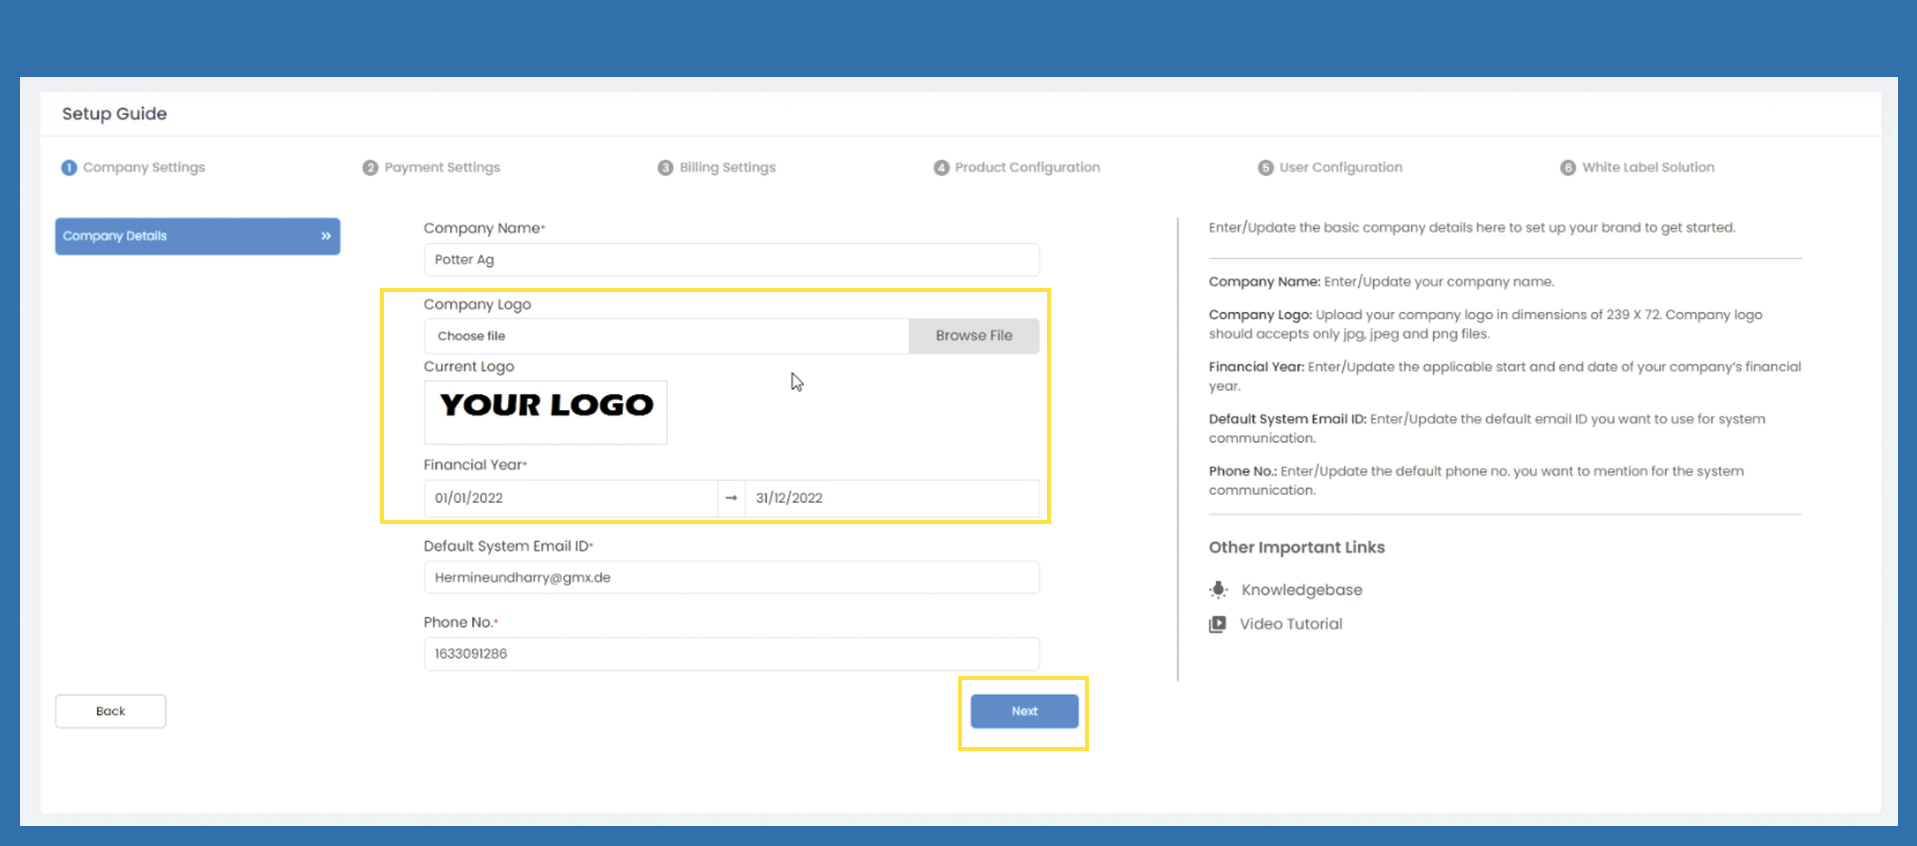
Company settings
Company name, default system e-mail ID and telephone number are filled in automatically. The data is retrieved from the registration page. Please check the data for accuracy and correct it if necessary.
Select the logo and note the appropriate size of the logo. This is described on the right-hand side. A popup will open, the blue frame is intended as a control function for the correct size. Within the popup you have to click on Save Image.
Adjust the financial year to your financial year.
If all data is filled in correctly, click on Next to go to the next page.
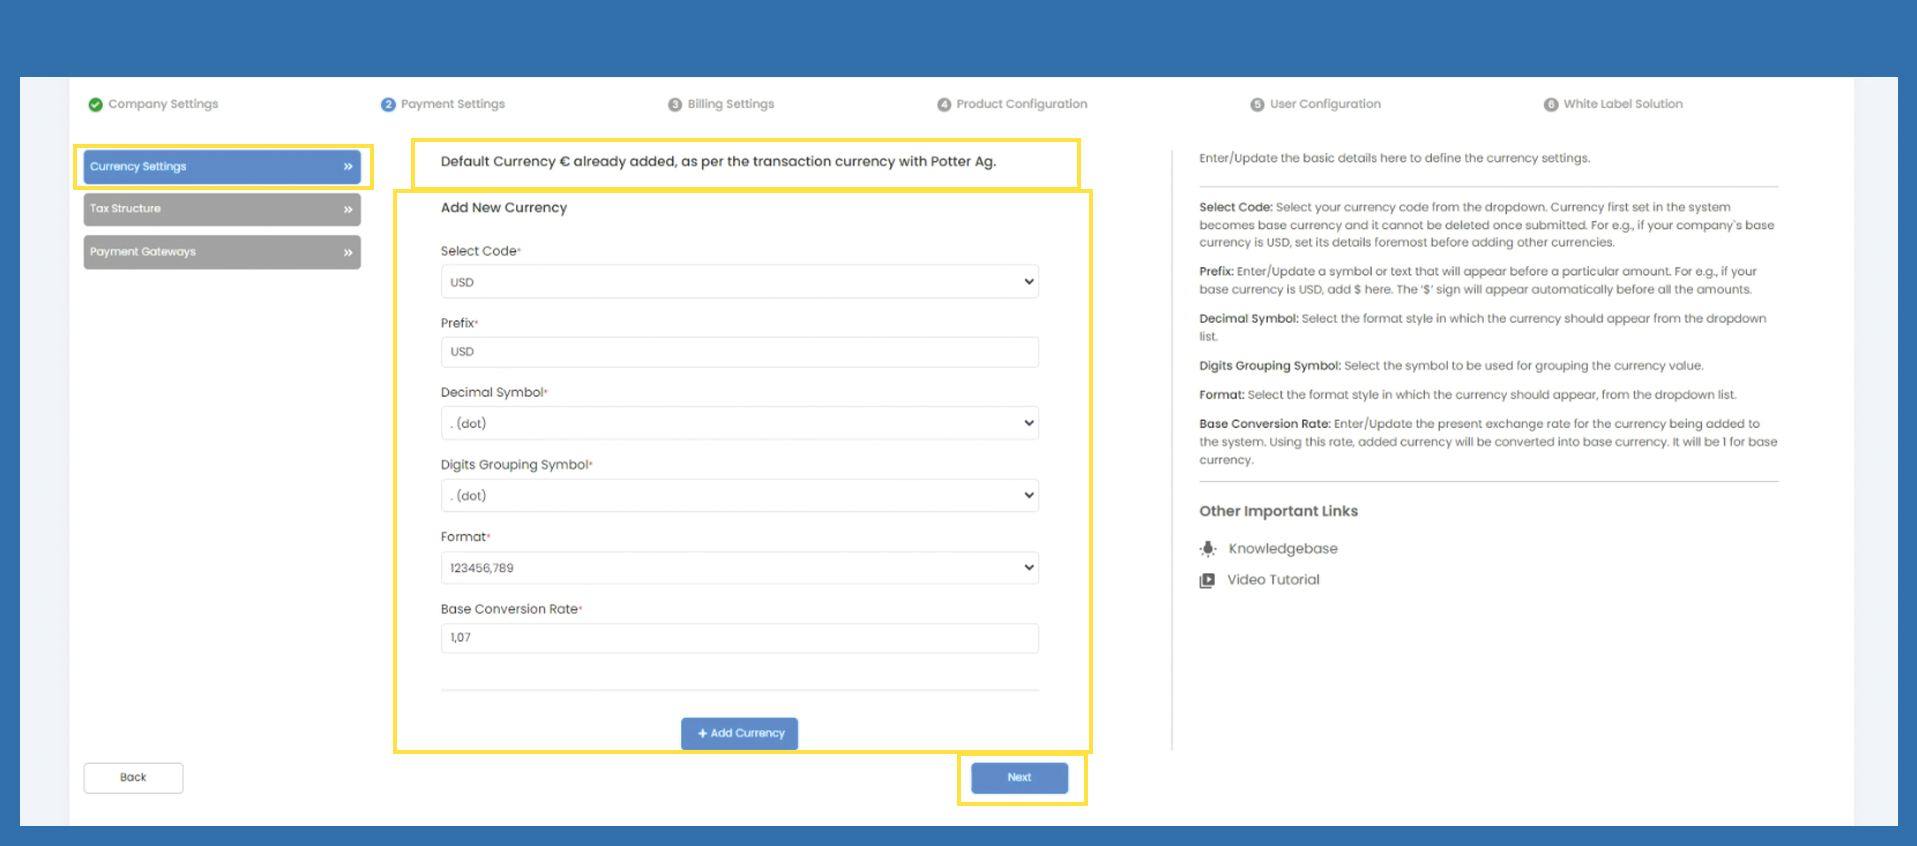
BildPayment einfügenSettings von> StartseiteCurrency Settings
The default currency is EUR. If no further currency is to be added, you can skip to the next point with Next.
If you want to add another currency, please fill in the following fields. The description can be found on the right-hand side.
Then click on +Add Currency.
2) CompanyPayment Settings > Tax Structure
AutoPlease Fillfill in fromthe registrationfollowing formtax information. Use the description on the right-hand side.
Choose Logo, beschreiben, dass im Popup ein blauer Rahmen zw. Kontrolle ob die Größe - Click on Save Image > New Logo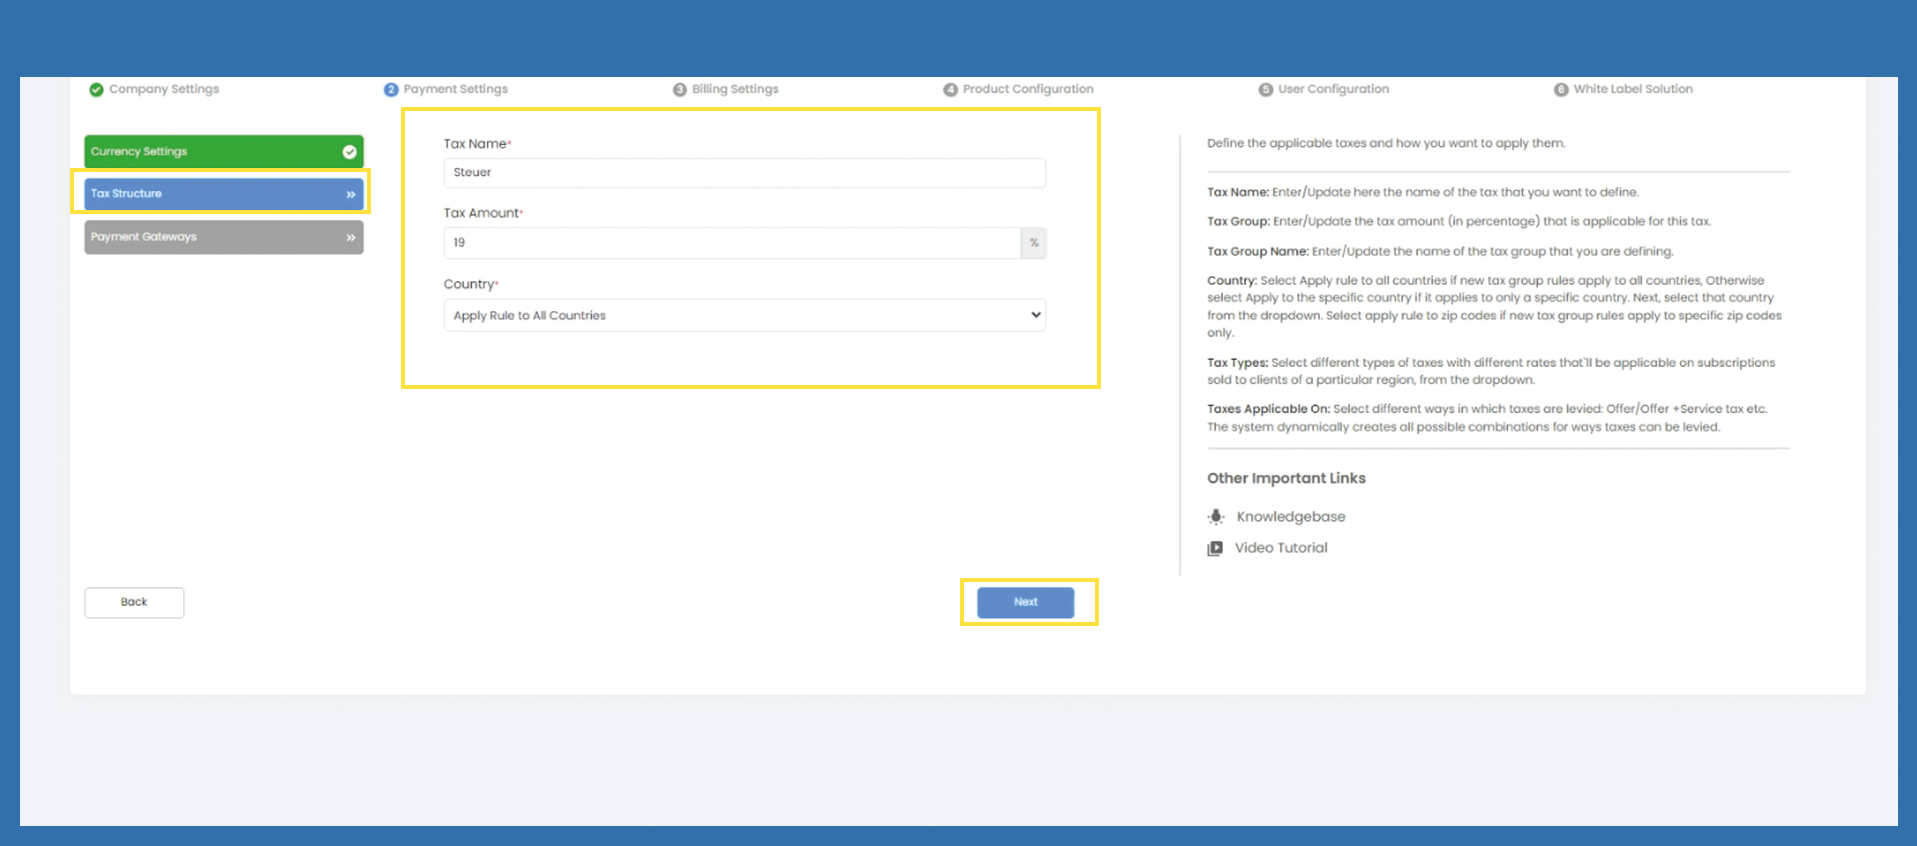
Financial Year dem entsprechenden GJ anpassen
3)Payment Settings > Payment SettingsGateway
CurrencyPlease Settingsfill in the corresponding bank details.
Default Currency € already added, as per the transaction currency with Potter Ag.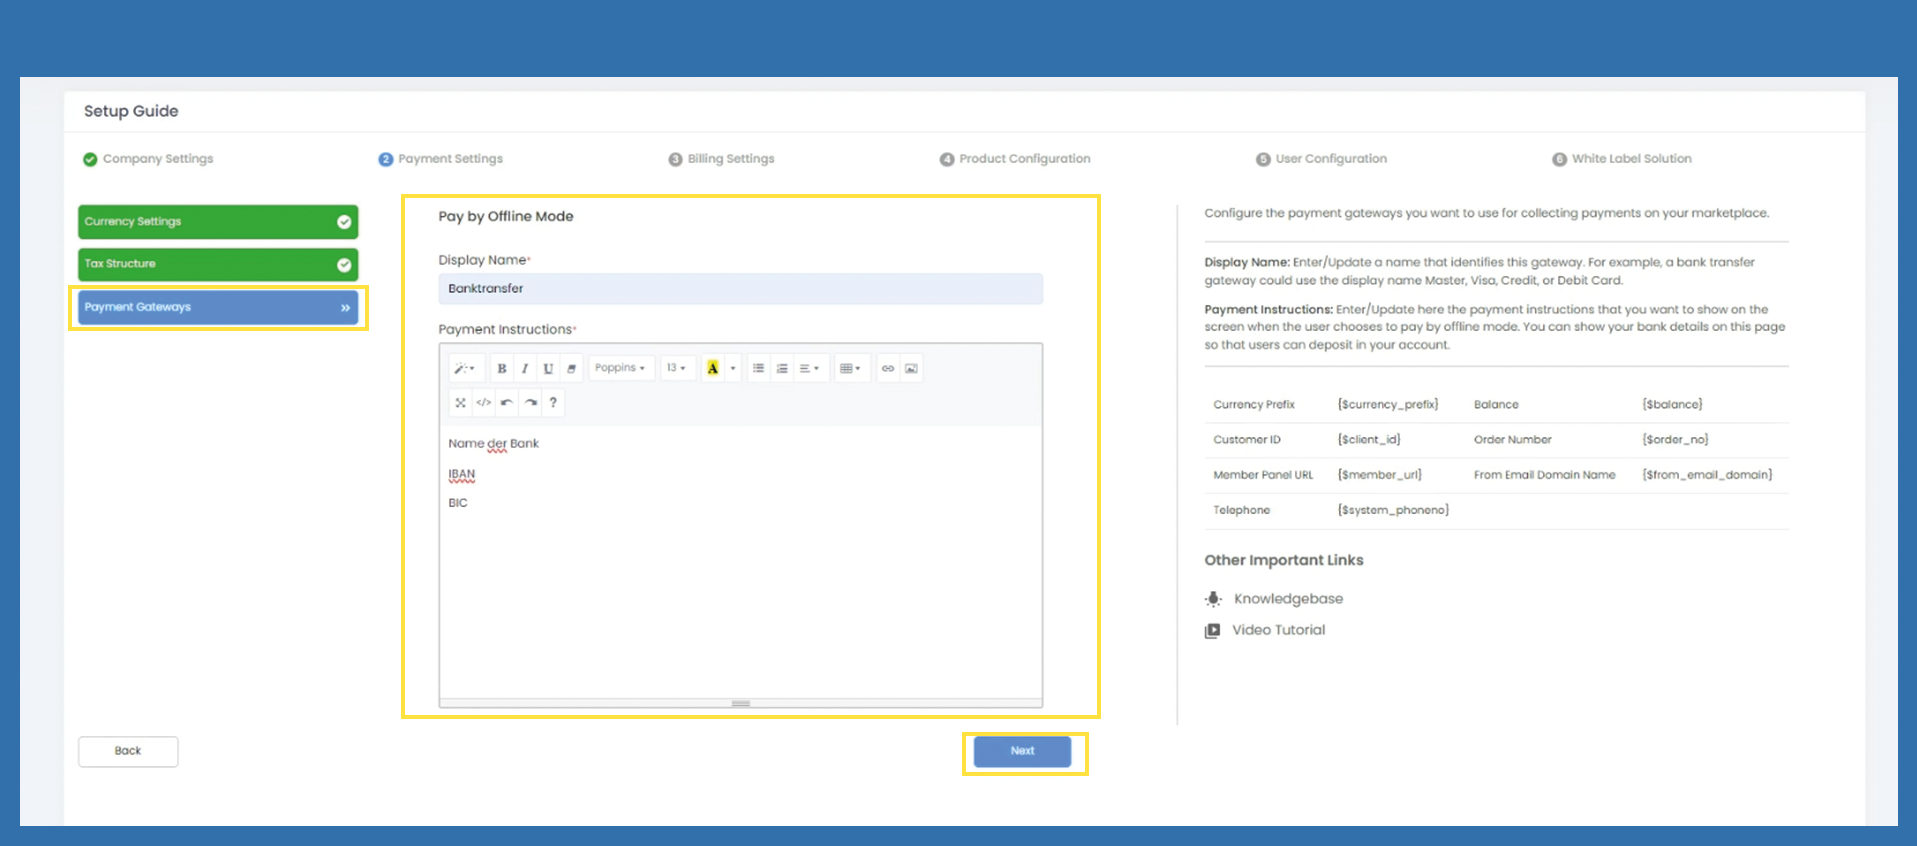
+ Add Currency Button markieren und Next Button
Tax Structure
Payment Gateway
Pay by Offline Mode
Billing Settings - wird rausgenommenrausgenommen.
Bild als Platzhaltereinfügen
ab hier ggf. neue Bilder einfügen....
Product Configuration
Choose Vendor und
Click on Enable , löst Anfrage an Admin aus. Click next
User Configuration
kann man ausfüllen, muss man aber nicht
Auf add user klicken
White Label Solution
Choose Internal or External